Share with us how you customize your recipes to "Make It Mine"
Buttermilk Fried Chicken
Southern fried chicken is one of those things where having growing up in the north I never quite knew what all the hype was about. Sure, I've had KFC and ordered it in a restaurant or two and it was good. But then one night we went to this little family owned joint in downtown Houston before a show and I ordered the fried chicken. It was one of those "aha" moments when you say "now I know what all the hype is about and now I know what it is supposed to taste like."

Not that I'm suggesting that you (or I) will be able to duplicate that anytime soon. If you didn't learn how to do this from your southern grandma who learned it from her grandma, you have a long way to go but you have to start somewhere. And this is a really good start.
But before you get started here are a few warnings to which you really should pay attention.
- Use a thermometer to measure the temperature of the oil and also the temperature of the chicken so you can tell when it is done.
- Do not ever leave chicken frying on the stove unattended. EVER!
- Measure the temperature of the oil often to make sure it doesn't exceed your desired temperature.
- Make sure the sides of your pan are high enough to handle the rise in the oil level when you put the food in the pan. When the chicken is introduced to the pan it will bubble which will cause the level of the oil to rise a bit. You do not want any chance of the oil spilling over the side of the pan.
- Be careful at all times. The oil is extremely hot and can cause very severe burns if it splashes on you or someone near the stove. Keep the kids and pets away from the stove area.
- Never introduce any utensil or any other implement that is wet with water to the oil. It is the quickest way to burn yourself or burn down your house.
- Oil can and will catch fire if you are careless and if it does, you need to be prepared. If the fire is in the pan, make sure you have a lid large enough to put on top of the pan right after you turn the heat off. NEVER throw water on a grease fire!!
- If the fire has spread outside of the pan you're on your own. I assume you are an adult and should know what to do if your house catches on fire.
- If you cook it's always a good idea to have a fire extinguisher handy in your kitchen.
- Above all, have fun!
Now that we've gone through that if you are careful you will be fine and the results will be worth it at your next picnic or family get together. And over the years you will get better and better at this as you experiment with times and temperatures and ingredients as well. So do have fun with this and be sure to stop back and tell us how you make it your own and make fried chicken better than any southern meemaw ever could. Enjoy!
Ingredients
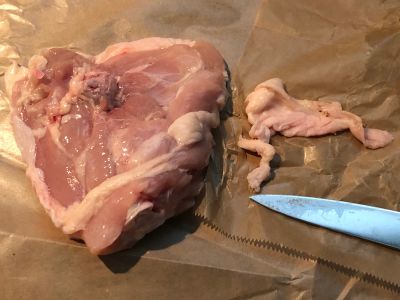
- 4 bone-in, skin-on chicken thighs, trimmed of excess fat around the edges
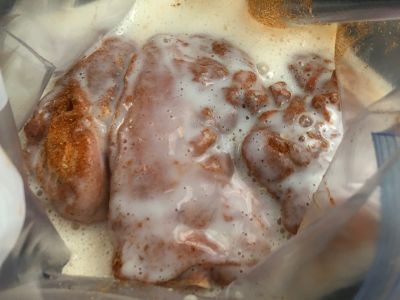
- 1 c buttermilk
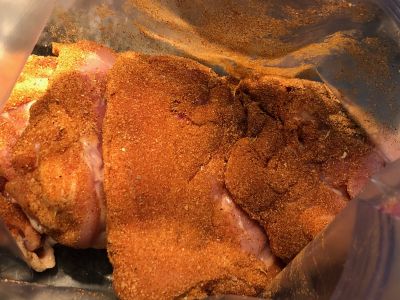
- 2 T cajun seasoning, divided
- 1 c flour
- 1 3/4 c oil for frying
Note - I use a 10" cast iron fry pan and it takes about 1 3/4 cups of oil for 4 pieces of chicken. If you are doing less you probably want another 1/4 c of oil. Generally the oil should be at about 1/2" deep which is best for frying chicken. Also, use an oil with a high smoke point like peanut, canola, corn or vegetable oil. You can also use vegetable shortening or lard. Do not use olive oil.
Instructions
1. Prepare the chicken by trimming fat off the edges and along the body. Be careful not to pull the skin away from the meat during this process. We don't want a lot of excess skin flopping around in the hot oil.

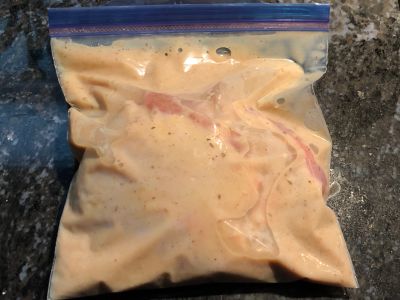
2. Add the chicken, 1 tablespoon of the cajun seasoning and the buttermilk to a sealable zip lock bag. Once the bag is sealed, mix it all together so the chicken is coated evenly.
3. Place the bag in the refrigerator for at least 4 hours or overnight if you prefer. According to the USDA you can marinate it up to 2 days but there is no real benefit to doing that. We prefer to think of it as 6-8 hours is plenty long enough and any longer than that is more for convenience than a benefit to the chicken.
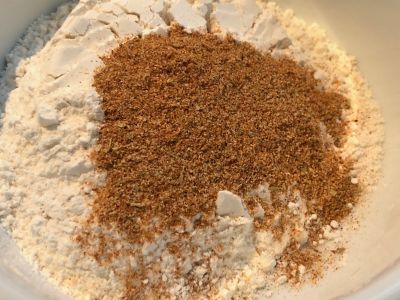
4. Add the flour and the other tablespoon of cajun seasoning to a zip lock bag or a bowl and mix together thoroughly. I prefer using a bowl for this but that is merely preference. I like to be able to handle the chicken and make sure the flour is evenly distributed. But the bag is probably a little easier on the cleanup side so many people use that.
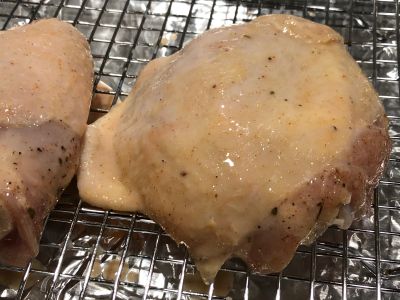
5. After marinating, remove the chicken pieces from the bag and place them on the rack to rest for 20 minutes. Discard the buttermilk as it is contaminated with raw chicken. Do not reuse it for anything else.
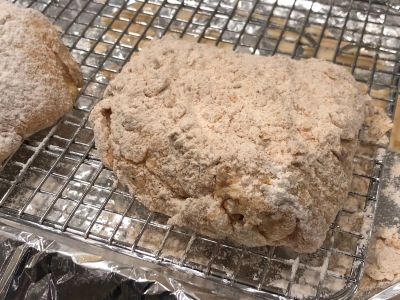
6. Add the chicken pieces one at a time to the flour to fully coat with the seasoned flour mixture. Take each piece out of the flour after dredging, shake it off, and place it back on the wire rack until ready to fry.
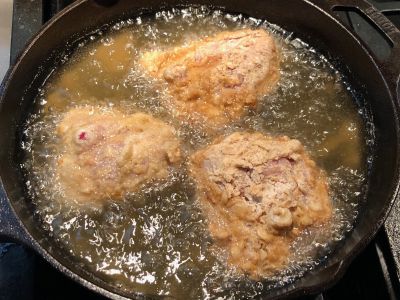
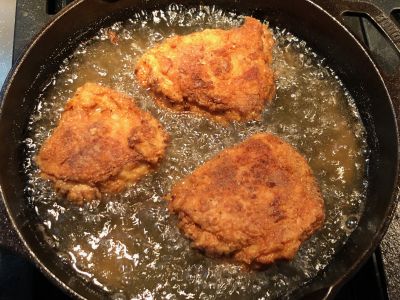
7. About 10 minutes before you are going to start cooking, add enough oil to a your pan to come to a depth of about 1/2 inch and heat it to between 340° and 350° F over medium high heat. Cast iron is best for frying because it holds heat longer allowing you to maintain a consistent temperature while frying. And a pan with higher sides is not only safer because of splatter, it makes for easer cleanup.
8. When the oil is hot enough carefully place the chicken in the hot oil skin side down using tongs by laying it into the oil away from you so the oil does not splash on you. Do not overcrowd the pan as it will bring the temperature of the oil down too much. Monitor the oil during the cooking process with a frying or candy thermometer to make sure it stays right between 300° and 325° F. As long as it is bubbling pretty good you are fine. The two mistakes you can make here are to not have enough heat and the chicken will get soggy or to have too much heat and it will burn.

9. Cook for 9 minutes and then carefully turn the chicken pieces over and cook on the other side until the internal temperature reaches 165° F. This is when it really helps to have an instant read thermometer so you can see the internal temperature of the chicken. It should take about 8 - 10 minutes to get to that temperature.
10. When it is done, carefully remove the chicken to a clean rack. Paper towels are ok to dab it and remove excess oil but if you place it on paper towels right out of the grease it will make it soggy. And do not reuse the same rack you used previously without cleaning it first at it is contaminated with raw chicken. If you don't have a rack, use a paper grocery bag to drain the chicken.
Summary
Serve it warm or at room temperature. And if you are going to be eating it later, go ahead and refrigerate it. It makes great leftovers for weekday lunches. It is best to put it in the refrigerator on a plate uncovered until it cools down and then place it in a bag. If you place it directly into a bag while it is warm it will develop moisture and become more soggy. It will still taste great however!

Let us know how you do with your version of fried chicken. Everyone is waiting to hear from you. Enjoy!
| Recipe Yield: | Serves 2 |
| Prep Active: | 0 |
| Cooking Time: | 45 |
Share Your Opinion of this Recipe and How You "Make It Mine"
We're very glad you have chosen to share your thoughts. It's what we're all about. (All comments are moderated)
Please enter your name so people will know which comments are yours. You can use your real name or pick a user name if you prefer. To subscribe to our newsletter, enter your email address. And we never share any of your information with anyone, EVER! And if you submit a rating it must be accompanied by a comment and a name to be counted.
Get Our Newsletter!
Follow Us!

Recent Comments
Meat Loaf
The meatloaf was moist, smooth and cooked perfectly through. The glaze was different but terrific...a nice change. Totally recommend and I give 5 s...
Eileen -- 5/17/18
I boil mine in the pressure cooker for 5 minutes, the easiest eggs to peel
Kori -- 4/10/18