Share with us how you customize your recipes to "Make It Mine"
Oven Cooked Baby Back Ribs
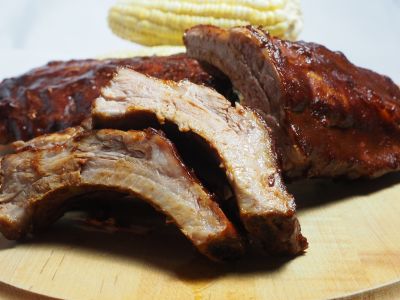
These oven cooked baby back ribs go from refrigerator to table in a little over three hours and are incredibly flavorful, juicy and downright satisfying. When I developed the dry rub, I included ingredients that would impart that smokey flavor including smoked paprika and other smoked peppers. That combined with some good ol' Texas barbecue sauce and you have the makings of a pretty good Sunday afternoon eating ribs and drinking ice cold long necks.
Having spent many years in Texas I got to know barbecued ribs pretty well. Of course those are slow cooked in a smoker for hours using a number of different techniques. Living in Boston doesn't afford me the opportunity to have a smoker or even a grill at this point so if I want ribs they are coming out of the oven. With that in mind I embarked on a research endeavor to make something better than just serviceable or slow cooker ribs. I believe, and my friends believe, that I succeeded.
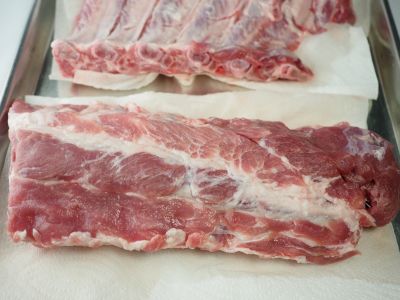
This recipe uses baby back ribs, sometimes called loin back ribs, loin ribs or back ribs. They are the curved section of the rib bones closest to the loin meat. The flatter cut ribs taken from below down toward the belly are called St. Louis style ribs. For this recipe make sure you get baby back ribs.
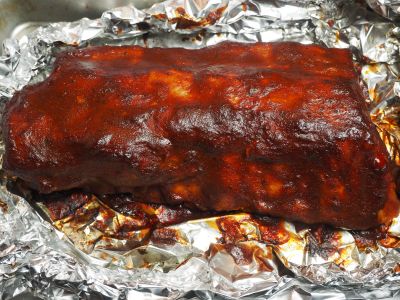
There are two things you need to have to make good ribs. First, you need a good cooking technique which has nothing to do with flavor but everything to do with texture. These ribs cook for a period wrapped in foil and are then finished in the dry heat of the oven. This method allows us to develop a couple of layers of flavor while cooking the ribs to a succulent tenderness but not until they are falling off the bone.
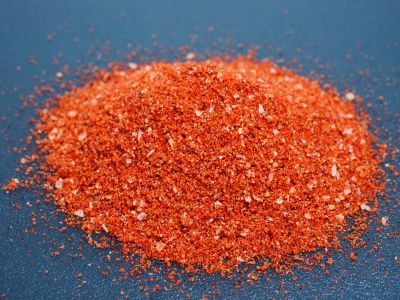
The second thing you need is to flavor the ribs. For that I am again using a two step process. I came up with a rub recipe that accentuates a deep smoky flavor. This is applied before the ribs go in the oven and flavors the meat as they are allowed to sit in the refrigerator until we are ready to start cooking. Once we start using the dry heat of the oven, I apply sauce to the ribs to give them a great flavor and to moisten them somewhat.
When you bite into these ribs you can appreciate the texture of the meat but it is so tender and juicy that you just can't stop. So get the beers chilled, go to your butcher and grab a rack or two of baby back ribs and let's get cooking. And do not plan on having any leftovers. Enjoy!
Ingredients
- 1 rack baby back ribs - (sometimes called back loin ribs, back ribs or loin ribs, but not St. Louis Ribs), cut in half for easier handling
- 4 T Dry Rub for Pork Ribs
- 3 c barbecue sauce - I think Stubb's Original works really well but use your favorite
Instructions
1. These instructions are for 1/2 rack of ribs. Follow the same instructions at the same time for as many ribs as you are making. If you are doing more than 1/2 rack of ribs, each 1/2 rack should be wrapped and seasoned separately. And you don't have to cut them in half if you have a big enough sheet pan and oven, that is for convenience purposes only.
2. Mix the rib rub if you have not done so already.
3. Place ribs meat-side down on a cutting board. Prick the back of the rib rack several times with a knife, or score it with the tip of a sharp knife between the bones. Don't cut too far into the meat, all we are trying to do is open the membrane to allow the rub to get in contact with the meat.

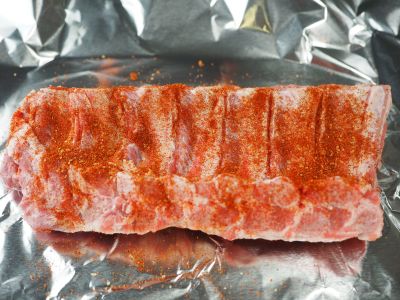
4. Turn the ribs over so the meat side is facing up. Apply approximately 1 T of dry rub to meat side of ribs to generously coat them and rub it into the meat with your hands.

5. Place a sheet of aluminum foil that is big enough to easily wrap the half rack of ribs on a sheet pan. Place the coated rib rack meat side down on the foil sheet.

6. Apply 1 T dry rub to bone side of the rib rack.
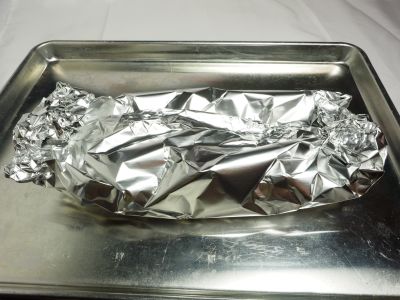
7. With rib rack still meat-side down, fold foil around it to create a tight seal. This is best done by bringing the lengthwise sides of the foil up over the meat and fold them together tightly. The bring the ends up over the meat and make sure they are sealed.
8. Place the sheet pan in the refrigerator for at least 2 hours and not more than 24 hours.
9. 3 1/2 hours before you want to serve the ribs, take the sheet pan out of the refrigerator and place it in a cold oven. Turn the heat to 250° F and set the timer for 2 hours.
10. After the two hours, remove the sheet pan allow the ribs to sit untouched for 20 minutes.
11. Increase oven temperature to 350° F.
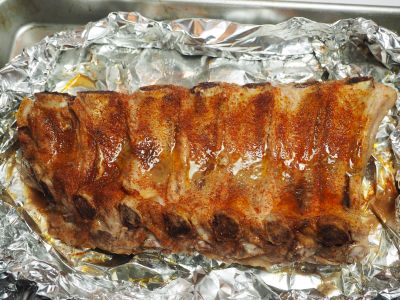
12. Being very careful for escaping steam, open foil and drain off the accumulated liquids.

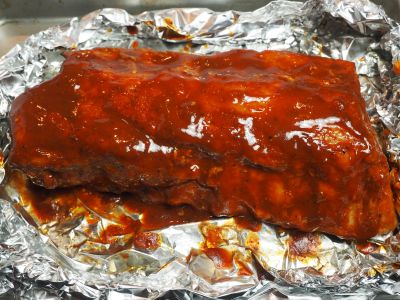
13. Brush barbecue sauce on the bone side of the rib rack.
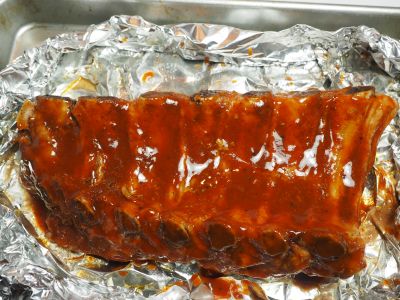
14. Turn the rack over over so the meat side is up. Brush barbecue sauce on the meat side of the ribs. Place the sheet pan with the foil open all the way and folded back from the ribs into the 350° F oven. Bake for 10 minutes.


15. Remove from the oven, brush barbecue sauce on meat-side only, return it to the oven and bake 10 more minutes.

16. Return to the oven for another 10 minutes.
17. Remove from the oven, brush with barbecue sauce again and return to the oven for 15 more minutes this time. If you like it a little crustier you can leave it for an extra 5 minutes.
18. Remove the ribs from the oven and admire your handiwork. But don't eat them just yet. We want them to rest for about 10-15 minutes. So tent them loosely with foil and get all your sides ready to go.

Summary
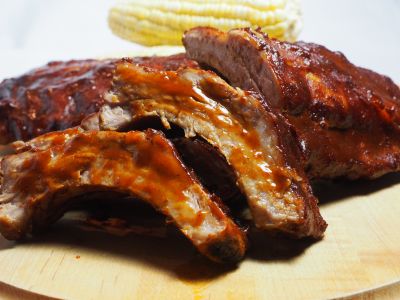
After the 15 minute resting period, cut into individual ribs and set them on a platter with a dish of barbecue sauce and a basting brush so people can add as much sauce as they like. Serve with beans, cole slaw and cornbread.
| Recipe Yield: | Serves 4 |
| Prep Active: | |
| Prep Inactive: | |
| Cooking Time: | 210 |
Share Your Opinion of this Recipe and How You "Make It Mine"
We're very glad you have chosen to share your thoughts. It's what we're all about. (All comments are moderated)
Please enter your name so people will know which comments are yours. You can use your real name or pick a user name if you prefer. To subscribe to our newsletter, enter your email address. And we never share any of your information with anyone, EVER! And if you submit a rating it must be accompanied by a comment and a name to be counted.
Get Our Newsletter!
Follow Us!

Recent Comments
Meat Loaf
The meatloaf was moist, smooth and cooked perfectly through. The glaze was different but terrific...a nice change. Totally recommend and I give 5 s...
Eileen -- 5/17/18
I boil mine in the pressure cooker for 5 minutes, the easiest eggs to peel
Kori -- 4/10/18